Table of Contents
Joulemeter [JM]
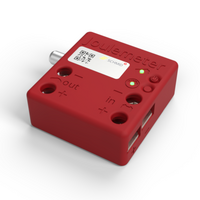
All vehicles are required to install a Joulemeter.
See also 2027 Official Rules Chapter I Article 56: Joulemeters
Description
The joulemeters used in Shell Eco-marathon are custom built for Shell and are not available for purchase. The joulemeter (JM) measures voltage across the + and – bus bars and current through the bus bars. The JM calculates joules from measure of voltage, current, and time. The JM will be used in all Shell Eco-marathon energy classes to measure electrical energy flow. Firmware in the JM measures the following;:
- Positive and negative joules,
- Totalized joules
Installation before event
Prior to arrival at the event, teams must identify a location to accommodate the Joulemeter near to the battery.
Installation at event
- The Joulemeter may be secured with cable ties, Velcro or other suitable method.
- The LEDs of the Joulemeter must be visible when looking into the engine compartment.
- The Joulemeter “On” switch located on the top of the Joulemeter must be accessible.
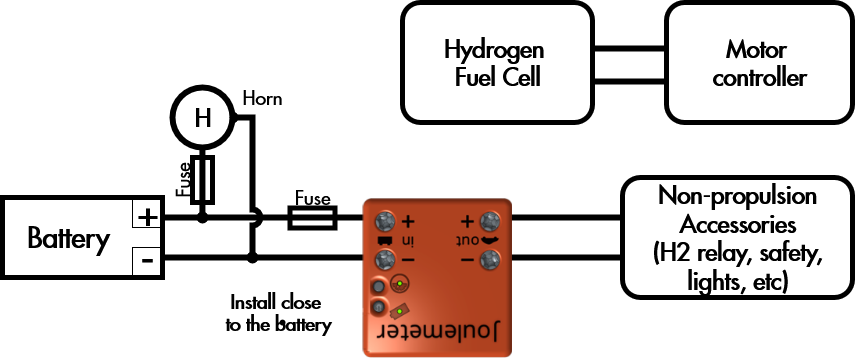
- As shown in the figure, both the positive and negative battery leads pass through the Joulemeter.
Installation - Internal Combustion Engine

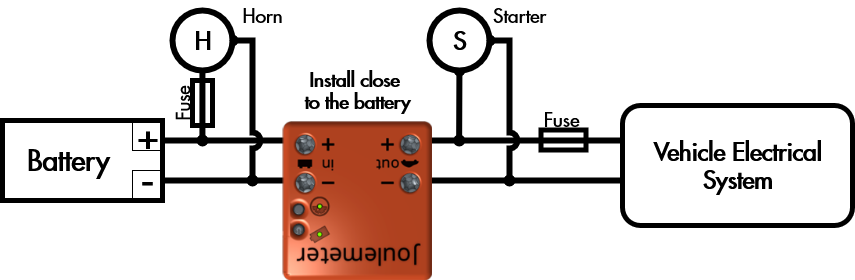
- The Joulemeter must be installed between the vehicle’s accessory battery and the vehicle’s electrical system.
- For ICE vehicles using hybrid technology with a Supercap a second JM will be used to measure Supercap voltage. Install wires from the Supercap positive and negative leads to the JM positive and negative input connections.
- Teams have a choice of powering the horn either before the JM or through the vehicle electrical system.
Installation - Battery Electric

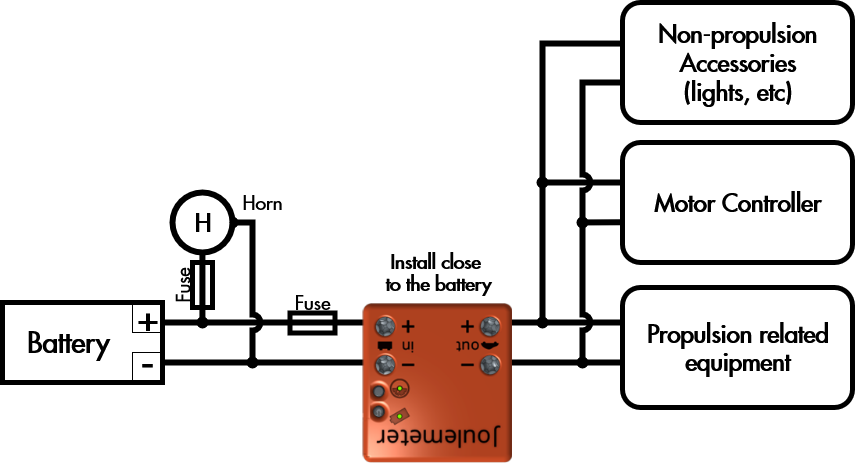
- The joulemeter must be installed between the propulsion battery and the vehicle electrical system.
- Teams have a choice of powering the horn either before the JM or through the vehicle electrical system.
Installation - Hydrogen

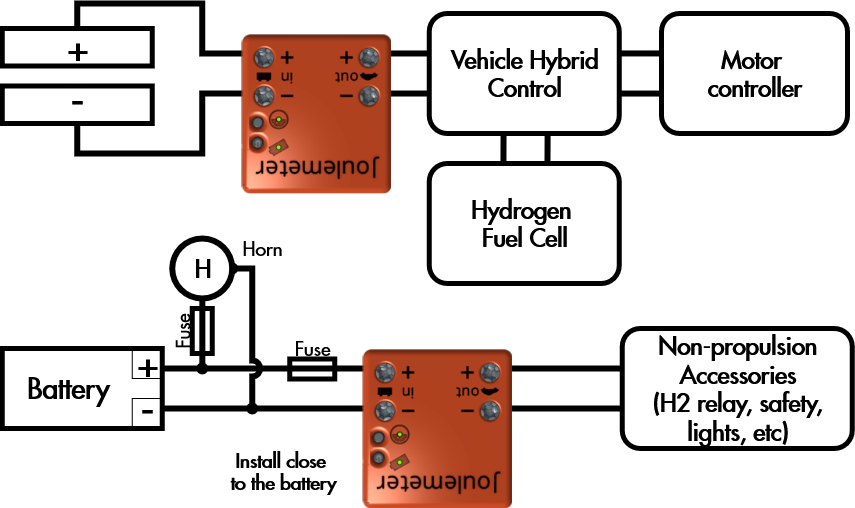
- The Joulemeter must be installed between the accessory battery and the vehicle’s electrical system.
- Teams have a choice of powering the horn either before the JM or through the vehicle electrical system.
Characteristics
| Dimensions | 91.25mm x 85.5mm x 36.5mm (excl. plug) |
|---|---|
| Weight | 300g |
| Battery lifetime | Fully charged to Low Battery > 4 hrs |
| Nominal current range | ±300 A |
| Max. pulse current (1 sec) | 1500 A |
| Nominal voltage range | ±450 V |
Drawings and Dimensions
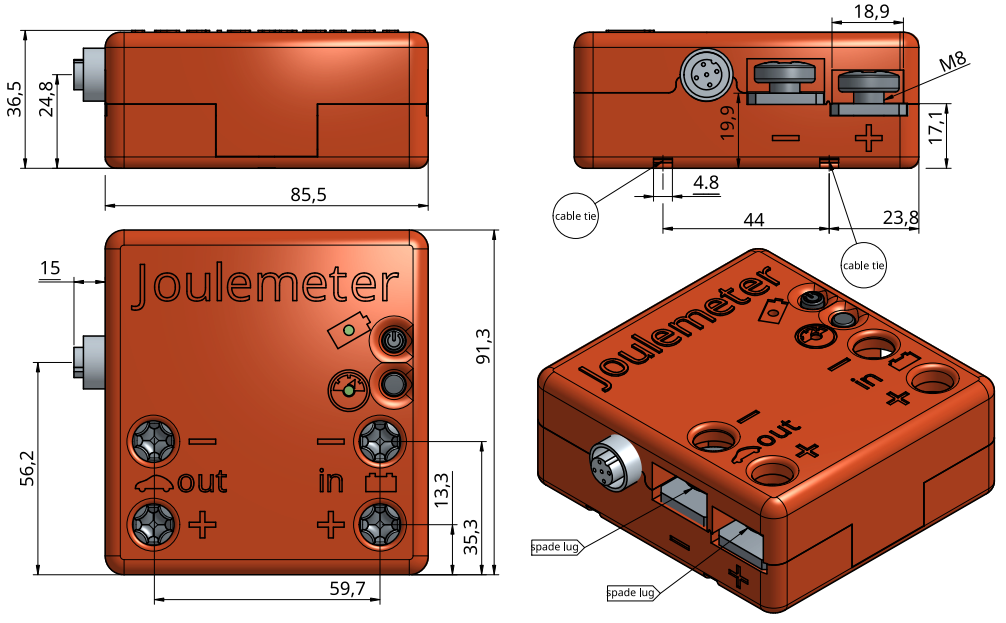
3D model
Handling
| LED Measurement |  |
|
|---|---|---|
| ❶ | Device off | |
| «❶» | Error | |
| «❶» | Initializing | |
| ❶ | Measuring | |
| «❶» | Resetting Values | |
| LED Battery |  |
|
| ❷ | Device off | |
| «❷» | low Battery, charging | |
| «❷» | Charging | |
| «❷» | Charging Complete / Operates without battery (Blinks twice followed by pause) | |
| ❷ | Low Battery  Not allowed to go on track |
|
| ❷ | Battery ok for 1 attempt Charge Battery soon |
|
| ❷ | Battery good for at least 2 attempts | |
| On/Off Switch |  |
|
| Practice | Turn the Joulemeter on before going on track. Ask the technical team if your consumption can be retrieved. Turn off after the consumption is read. |
|
| Competition | Do not touch the Joulemeter until your results are retrieved. | |
| Function Button |  |
|
| Used to initiate fast charging. | ||
Charging
Recharge the Joulemeter whenever it was on for more than 5min.
A fully charged Battery will last for at least 4 hours.
Charging a fully depleted battery will take about 3+ hours.
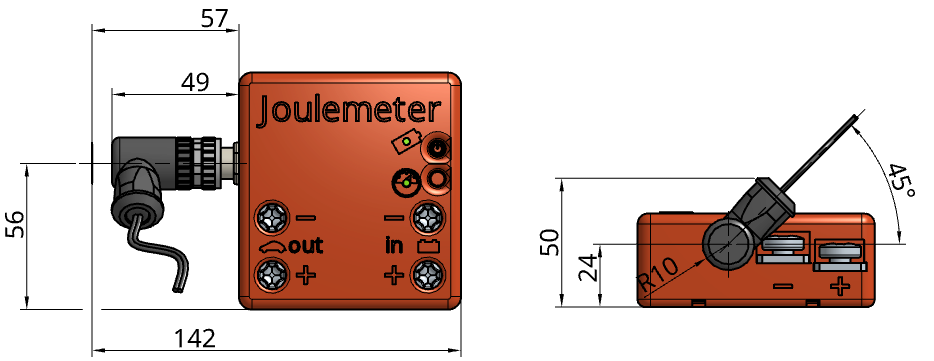
step by step
- Connect the charging equipment to the power outlet.
- Connect the charging equipment to the sensor. Make sure not to bend the pins
- Turn on the Sensor (The sensor must be on for the battery to charge.)
- (Ignore for LFM) To initiate charging mode on a Joulemeter press the Function button on the Joulemeter for 5sec.
- The Sensor's battery LED will be blinking as long as charging is in progress.